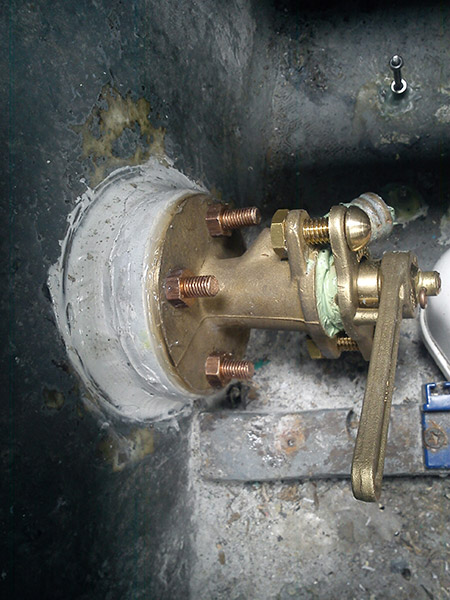
Fitting seacock was another challenge, especially drilling thru-hull central and 4 other parallel holes, they must be exact. I used Blakes one with flange and strainer.
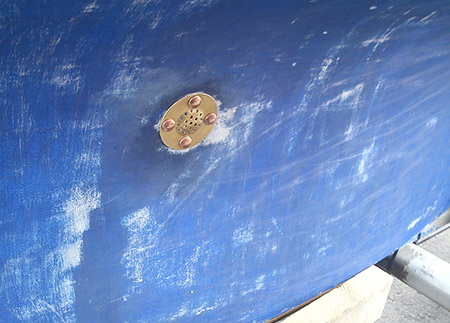
The only sensible location I found for it was in the bilges where was an easy access through the small opening in the floor and close to the engine. Inspired by the article on the Pbase .com website I have asked my friend to make for me two 19mm thick, kind of polyester (I can’t remember the name of the material) discs slightly bigger then the flange of the seacock.
One of them was used to add thickness on the inside and to make flat contact surface with the flange. The second was used as a leading tool for a drill bit on the outside. The only way to drill the holes was from the outside, so I started with a small, central leading hole. The same size hole was drilled in one of the discs, then the disc was aligned with the thru-hull hole and bonded using the same Crystic compound. Of course, the surface was well sanded and cleaned. The next step was to drill of correct size hole for the seacock.
The second disc was drilled to match the hole pattern of the seacock’s flange. I used thickness of both, the disc and the seacock on the outside to make sure the bolt holes were exactly parallel and after the first hole was drilled I inserted a bolt into it to make sure nothing will move. However, when the seacock was transfered to its proper location there was very small disalignment. But a bit of tweaking with the drill … and all was well.